Simple iPhone Earphone Mod

My Eargells were colorful: those available today are clear
When it comes to headphones I'm more of an over-the-ear, enclosed-back kind of guy. In my mind there's still no substitute for big drivers and a sealed enclosure to get decent sound quality. That said, those kind of headphones are bulky to carry and conspicuous when you wear them so sometimes you need more pocketable earphones.

Perhaps I have freaky ears but I cannot find in-ear headphones small enough to fit in my ear canals and the standard headset that comes with the iPhone falls out of my ears with little provocation. I have to hold my head absolutely still and, because they fit so loosely, the sound quality, which is marginal at the best of times, is weak and tinny. Certainly I could not run wearing them or even walk around in them.

I contemplated the hack that I've seen to make custom silicon earpieces but that seemed like a lot of effort for the crappy stock headset. Then I came across Jabra eargells. They seem to be intended for ear-bud style headsets but with a little persuasion they'll fit on the standard Apple earphones. They don't stay in place very convincingly though so I added a couple of drops of plastic-specific super glue to them to keep them from moving. I can now run wearing these headphones and the sound quality is much improved as the little sound there is is directed into your ear instead of spilling out. The sound quality does not approximate a decent pair of enclosed headphones but that was never the point. At least I can now use the OEM headphones when I'm out and about which were previously useless to me. I can stuff them in a pocket and if I loose or break them I won't be upset.

Cost: less then $10.
Time invested: 10 minutes.

Adventure in RC Helicopters: Are We Having Fun Yet?

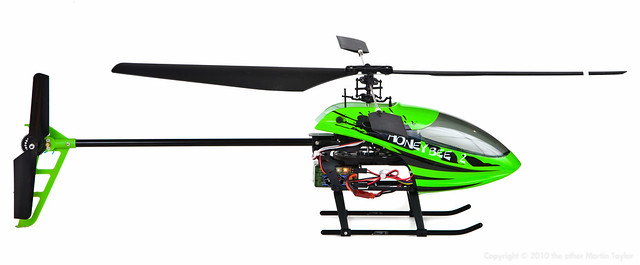
I gave up on waiting for xheli to get a working battery to me for my Honey Bee V2; I know they're super busy in the run up to Christmas but it was incredibly frustrating to have my helicopter in-hand but not be able to fly it. I ordered a couple of spare batteries from another supplier. I wish I could tell you that experience was better but I ordered what was advertised as genuine eSky batteries but I received generic, un-badged batteries.They were about half the price of the eSky batteries from xHeli and I couldn't be bothered to go through another round of emails and returning an order so I've kept them. At least they took a charge.

While I was looking into batteries I got all paranoid about LiPo batteries failing and burning down the house. The RC forums seem to be littered with tales of LiPo batteries failing  and either exploding or catching fire for no good reason. To protect myself and my home I bought a LiPo charging bag. That's a fancy name for a fire-retardant bag you but the batteries in while they're charging, and when they are charged, so that, if something does go wrong and there is a fire or an explosion, it remains safely contained.  Word to the wise: don't put the charger itself in the bag. I did the first time and the charger must have over-heated because its lights were flashing some combination that wasn't even deciphered on the badly translated key. After being left to cool it seems to be working fine again now.

I had been using the simulator to understand what controlled what but it turns out to be an unsubtle model of the real thing. Hovering in the simulator is easy; a little power, a little rudder and there you are hanging in the air - real life is another story. But I'm getting ahead of myself...

I knew that, being older, I would find learning to fly a little tougher than your average teenager weened on video games so I decided to follow Radd's School of Rotary Flight. He subscribes to the slow-but-steady school of thought.  Basically, you keep the helicopter on the deck and learn the controls before you even try to hover. In theory it's the best way to learn; in practice it's dull. You have to expend 9 batteries worth of flight time without ever leaving the deck. Movements outside a 1 foot square constitute a 'crash' with the punishment of having to reset everything if you stray outside that area. I thought this was supposed to be fun?

Transmitter Settings
One obstacle I found was that the manual gives bad information about setting the slide switches on the transmitter to setup the mode and orientation of the controls. For mode 2 it describes setting the aileron = 'down', elevator = 'up', throttle = 'down' and rudder = 'up'. I found on my example the aileron and elevator switches had to be set the opposite way than the manual describes. After discovering that the controls felt a little logical at least.

The other obstacle I encountered was that the helicopter always wants to slide left which makes the ground exercises tricky unless you hold the aileron stick hard to the right much of the time. The simulator does a poor job of representing this effect. This drift is especially pronounced on a low friction surface (like the tiles in my kitchen) and the helicopter skates and drifts all over the place as soon as the skids get remotely 'light'. It seems that the helicopter starts to drift before the cyclic controls have any effect on direction.

All of which just encouraged me to race through to that 10th battery when you are actually allowed to leave the deck for the first time. It is fun to see your helicopter in the air for the first time. It's less fun to see its first crash. Controlling movement in the air turns out to be very different from making the helicopter scoot across the kitchen floor. For one thing the movements on the stick have to be way more subtle.  For another, there's no breeze in the kitchen. Even when it looks totally still outside I'm learning that there is wind movement pushing your helicopter out of your control.

Which leads to your first crash. I say 'crash' but that is something of an over statement; 'heavy landing' is more accurate. I was over soft ground with the training gear on when a breath of wind pushed the helicopter behind me and threaten to topple it over. I was only three feet off the ground so I did what any beginner would do; I panicked and cut the throttle. I must have come down pretty hard through because the blades weren't level after that and spinning them up caused them to clip the tail boom. It's a scary thing to see your new toy bent out of shape although it turned out that I'd just popped a bearing out of the center hub. It didn't take long to diagnose or to fix.

Harder to diagnose was a transmitter 'problem'. The ET4 transmitter has Voltage Indicator lights and the manual says "When the last light turns red and flash, the dry batteries are in low capacity and need to be replaced".  Either the transmitter eats batteries or the batteries that shipped with it are crap because, after playing on the simulator a bit (the transmitter has to be turned on if you're using it as your controller) and my 10 helicopter battery cycles the transmitter's bottom two lights (red and yellow) were the only two lit. 'No problem', I thought. 'I still have some time left before I need to change them according to the manual.' Wrong! With the green lights out the transmitter won't bind to the helicopter. As this coincided with my 'heavy landing' I saw the transmitter having no effect on the helicopter and assumed the worst - that I'd burnt out the 4in1. After much fretting and fiddling I tried fresh batteries in the transmitter and all was well again.

So that's where I'm at. I still can't fly but, given enough room to drift around I can hover ... a bit... a very little bit. I've found the manual and simulator to be inaccurate in places. My helicopter is no longer virgin - it has some dirt and scuffs on it but I haven't had to use any of the spares that I ordered yet. To answer my original question, yes, we're having fun already even though I've got a long way to go.

Adventure in RC Helicopters: Go-Faster S107

S107 Easy Hack
While still waiting to get a working battery for my Honey Bee V2 I continue to mess around with the Syma S107  in the office. It's a great distraction: if I get frustrated with code I just go into a quiet machine room with my toy helicopter and mess around for five minutes. Invariably, when I get back to the desk the problem I was trying to escape doesn't seem nearly as daunting. Perhaps my employer should provide all its software engineers with this toy to make them more productive.

Anyway, I wanted to make the S107 go a little faster. I tried what some have suggested, removing the weights from the ends of the flybar but it became too unstable. Instead, I removed the tail do-dads, boom support struts, and rear skid legs. You loose a little weight and strength but it can still survive a crash pretty well. Because the center of gravity has moved forward slightly the helicopter will now move forward at center stick and it takes quite a bit of rear stick just to hover. So, at the cost of a little stability you get a lot faster forward momentum.

The only other hack I've done to the S107 is remove the spring that held the throttle at 0%. Now you can fly it more like a proper RC helicopter with two fingers holding each stick and the throttle not fighting against you all the time. If you do this just remember that you must cut the throttle before you crash otherwise you will do more damage to your helicopter (again, like the bigger, hobby helicopters) which is probably the reason the spring is there in the first place. 

Adventure in RC Helicopters: Battery / Charger Problems


I mentioned how excited I was at the arrival of my Honey Bee V2 but how I wasn't able to fly due to either a battery or charger problem. Yesterday a new charger finally arrived from xHeli but, as I feared, it didn't resolve the issue. So I still can't fly; I'm still frustrated and my issue remains open on the xHeli forum. Maybe I'll get to fly before Christmas; who knows?

Update: They got back to me via the forum and now want me to send the battery back to them for testing. How long before they get around to testing it and sending me a working battery? I am getting tired of the time and effort it is taking with xHeli to get a working product so I ordered a couple more batteries from another supplier to see if I can get satisfaction quicker that way.

Update 2: xHeli sent me an RMA number. Withing 24 hours I sent them the battery. Now all I can do is wait until someone can get a good battery to me.

Memory: The Poor-Man's Upgrade

Circuit Tracks
Back when I used to build and over-clock my own PC's Memory was called the poor-man's upgrade. For much less money than replacing your CPU, which usually involved replacing your motherboard and all the hassle that entailed, you could max out your memory and keep your PC's performance contemporary for another 12 months or so. These days it's just not cost effective to build your own PC but it's still useful to be able upgrade your desktop when required.

My current desktop is the case in point. I tend to buy off the shelf PC's and then add to them as required. I expect a PC to last me about 3 years or a little more. My current workstation is a HP Core 2 Quad 4 CPU running Vista 64 that I bought a little over 2 years ago. I know a lot of people complain about Vista 64 but I actually like it. It has been tweaked in the past couple of years. To drive my main monitor, a Dell 30" LCD that I love, I had to replace th video card. To power the video card I had to replace the power supply. I've added a couple of extra internal hard drives to it to keep up with my ever expanding photo archive and I'll add another before I'm done.

For most people and most tasks this PC would fly but most of the programs I like to use are memory hogs. Sketchup, Lightroom, Sony Vegas, PhotoShop among others can each eat 2-3gb of memory. My PC came with 4gb so I should have been OK but Vista itself is resource hungry even without any of those other multimedia programs running and I noticed the memory usage often topping out at over 90%. I guess at that point the virtual memory (disk space) takes over but it is much slower so I was starting to experience performance issues waiting for these programs to respond or slow performance as the programs themselves were running sometimes.

To update my PC I took advantage of a Black Friday offer and bought 8gb of 'gamers' memory (basically memory with heat sinks attached from what I can see) the maximum my motherboard supports for around $150 shipped from NewEgg. It took a little fiddling and repositioning of one of the machine's hard drives to fit the new, chunky memory into the compact tower that houses my PC but I did wrestle it into place and it seems to have done the job. I can now run Lightroom, Sketchup and Google Earth at the same time and the memory usage doesn't reach 70%. I guess that means I'm not using scratch disk as much because all those programs seem to be running stutter free again.
WFH
I'm not saying that upgrading memory will make your old machine new again but it still seems to be a cheap way to keeping your middle aged machine current if you use a lot of memory intensive programs. Certainly, tonight I'm very happy with my $150 investment. Hopefully I'll remain so for another 12 months or so by which time 8gb of memory will be common-place rather than excessive and it will be time to upgrade properly.