By the time it arrived direct from China I'd almost forgotten that I'd ordered the little Chinook Helicopter from eBay for $25 shipped. It took 21 days from purchase to arrival so was it worth the wait?
It certainly had some big shoes to full as I love my little S107: it is so maneuverable, fun and easy to fly as well as being virtually indestructible and easy to repair when you do eventually snap something. The S206 is a very different animal despite being another coaxial IR helicopter from Syma. I was expecting them to share more components than they do; they do share the same charging mechanism and battery and a couple of components in the rotor-heads and the controller is similar but beyond that parts look unique.
The S206 is a vaguely to scale Chinook transport helicopter with double rotors - a similar configuration to the real CH-47. Compared to the S107 the S206's fly bar and rotor blades are shorter but work in the same way with two motors per head providing lift and directional control. Two sets of blades makes the S206 handle very differently than the S107: I don't feel like I have such precise control of the S206 but it is very stable and easy to hover. It doesn't feel as nimble but it seems to be able to move forward quicker but this may be a symptom of the way I have the S206 trimmed. The S206 controller has two buttons as well as the rotary trim. The two 'inch trim' buttons allow you to set up the amount of forward or reverse momentum the S206 has at center stick. Of course, I have mine set up to be moving forward at center stick so I can have lots of forward momentum but this means that you have to apply reverse stick to get this helicopter to hover and you need to apply reverse stick as you lift off or the S206's ground effect will cause it to shoot forward into the wall.
The S206 is a little twitchy: you can have your hands off the directional control and sometimes it hovers perfectly - at other times it seems to get caught in a spin. This may be a result of the specific model I have - the non 'G'. The G version may be more modern and have a more sophisticated gyroscope to keep things neutral. My version with the smoked cockpit glass and mains charger may be a little more agricultural in its handling but it is still a lot of fun.
The way the S206 turns is very different to the S107. The S107 turns on a dime pivoting exactly around the drive shaft: with two drive shafts in play the S206 pivots less quickly somewhere around the middle of the fuselage. As usual with these 3 channel coaxial helicopters the S206 wants to turn faster to the right than to the left.
Because my S206 came direct from China the mains charger supplied did not fit in a standard US wall socket without an adapter (the price of saving a couple of bucks). Those that appear to know more than me about battery charging technology claim that the mains charger is a little brutish on batteries. Unfortunately, the mains charger that comes with the S206 is the only means to charge it: unlike the S107 the S206 controller does not have a charging cable. Luckily the USB cable that comes with the S107 works perfectly well on the S206. Flying and charging times are as advertised; 8 minutes flying time and about 30 minutes to charge.
From an aesthetics stand point the fuselage detail is fun although decals of rivets around the around the porthole windows and and the silver of the turbine engines is a little silly and unsubtle. It feels solid, maybe even a little heavy which may account for its performance; as the battery falls from full charge it takes more and more throttle to get it to lift and in the end it struggles to get off the deck at all. My only concern with strength are the wheels that look flimsily but are they taking the knocks although I try to avoid the kind of heavy landings I know the S107 would take in its stride. As the fuselage acts as a kind of soundbox the S206 sounds a little plastic when compared to S107, not that that means anything.
If the S107 is the cheap Miata roadster of the Syma line the S206 is the little import pickup. If you already have the S107 and you want something similar but a different flavor the S206 is a lot of fun and at $25 it's terrific value.
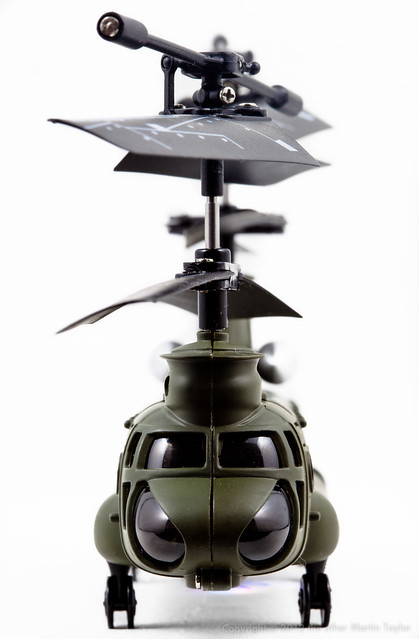 |
| Syma S206 Nose In |
The S206 is a vaguely to scale Chinook transport helicopter with double rotors - a similar configuration to the real CH-47. Compared to the S107 the S206's fly bar and rotor blades are shorter but work in the same way with two motors per head providing lift and directional control. Two sets of blades makes the S206 handle very differently than the S107: I don't feel like I have such precise control of the S206 but it is very stable and easy to hover. It doesn't feel as nimble but it seems to be able to move forward quicker but this may be a symptom of the way I have the S206 trimmed. The S206 controller has two buttons as well as the rotary trim. The two 'inch trim' buttons allow you to set up the amount of forward or reverse momentum the S206 has at center stick. Of course, I have mine set up to be moving forward at center stick so I can have lots of forward momentum but this means that you have to apply reverse stick to get this helicopter to hover and you need to apply reverse stick as you lift off or the S206's ground effect will cause it to shoot forward into the wall.
The S206 is a little twitchy: you can have your hands off the directional control and sometimes it hovers perfectly - at other times it seems to get caught in a spin. This may be a result of the specific model I have - the non 'G'. The G version may be more modern and have a more sophisticated gyroscope to keep things neutral. My version with the smoked cockpit glass and mains charger may be a little more agricultural in its handling but it is still a lot of fun.
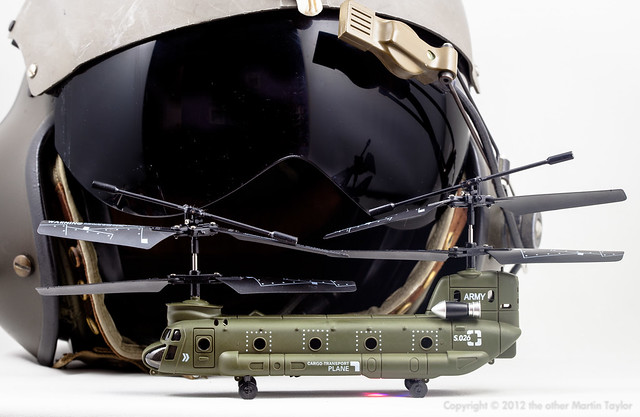 |
| Syma S206 backed my Helicopter flight-helmet |
The way the S206 turns is very different to the S107. The S107 turns on a dime pivoting exactly around the drive shaft: with two drive shafts in play the S206 pivots less quickly somewhere around the middle of the fuselage. As usual with these 3 channel coaxial helicopters the S206 wants to turn faster to the right than to the left.
Because my S206 came direct from China the mains charger supplied did not fit in a standard US wall socket without an adapter (the price of saving a couple of bucks). Those that appear to know more than me about battery charging technology claim that the mains charger is a little brutish on batteries. Unfortunately, the mains charger that comes with the S206 is the only means to charge it: unlike the S107 the S206 controller does not have a charging cable. Luckily the USB cable that comes with the S107 works perfectly well on the S206. Flying and charging times are as advertised; 8 minutes flying time and about 30 minutes to charge.
From an aesthetics stand point the fuselage detail is fun although decals of rivets around the around the porthole windows and and the silver of the turbine engines is a little silly and unsubtle. It feels solid, maybe even a little heavy which may account for its performance; as the battery falls from full charge it takes more and more throttle to get it to lift and in the end it struggles to get off the deck at all. My only concern with strength are the wheels that look flimsily but are they taking the knocks although I try to avoid the kind of heavy landings I know the S107 would take in its stride. As the fuselage acts as a kind of soundbox the S206 sounds a little plastic when compared to S107, not that that means anything.
If the S107 is the cheap Miata roadster of the Syma line the S206 is the little import pickup. If you already have the S107 and you want something similar but a different flavor the S206 is a lot of fun and at $25 it's terrific value.